Thursday, August 21, 2014

DIY Front Porch Facelift

For the last year, I thought we were moving. So all of my long-term dreams for my house were put on hold. 
*sigh*

BUT...

Three weeks ago my husband moved back home! And now that we are NOT moving (happy dance!), it took all of but 48 hours to start a project. As I was posting pictures of my painting projects on Instagram, my friend Heather teased me saying "Chad is home and it's PAINT ALL THE THINGS?!?"

Um, Heck yeah!

I finally painted my laundry room...


....painted my front door...
Sorry for the picture quality, I had to steal this off of my Instagram.


.....gave a couple things in my kitchen a spray paint face lift...


....and last but not least, I finally finished the front porch.

Last spring I was sick and tired of my ugly front porch. It's a three-seasons porch that had dark green indoor/outdoor carpet and dark wood paneling. 
It had to go.

I didn't get great "before" pictures because I wasn't really thinking about it. I was too excited to get started to think about making a nice looking blog post. So here are some of the ones I did get before and during the transformation.

See? Dark paneling. Blech. And a bulky shelf/coat hanger because we have no coat closet. Oh the joys of a 100-year-old house. :D

This is obviously when I started priming.

This is a dark photo, but it gets the point across. DARK. Dark and depressing. No thanks!

Once I got all the walls AND trim primed with two coats, I had Chad rip up the carpet. (JOY!!)


Carpet is gone and in the trash! Let the mama rejoice!

On to painting. After two coats of primer, I moved on to two coats of paint. White for the trim and a yellow called "Nectar" for the walls. Painting over dark paneled walls...not my favorite task.


I picked the yellow based off of my navy blue front door. The outside of our house is painted blue with white and navy blue as accent colors, so I wanted to keep the blue door. And while we are a Coastie family, I don't have any nautical decorations in my house. But I do like the yellow and navy combo so I went with it. 

Yellow is a tricky color in my opinion. You have to get just the right yellow. Too pale and it washes out, too bright and people have to get out their sunglasses. Well, boy did I find it! In case you didn't notice by the pictures above, this Nectar yellow is my new color crush. I used it in the laundry room and the inside of my front door. I'm in love!


Look at how pretty! So sunny and happy!

The last major step was putting in the floor. We got really lucky (as far as our checkbook goes) because around the same time we were doing this, my in-laws were remodeling their kitchen. So they graciously gave us the flooring from their kitchen. It was still in good shape and was almost exactly the amount we needed. Win!

Now that the hard part is done...time for a little trip to Pier One aaaaand...


BA-BAM. Summer sale at it's finest. 

This porch facelift turned out to be a huge blessing-in-disguise because just two short weeks after the it was finished, we endured a hardship. This porch became my "happy place". I sat here many days that summer trying to make peace with what we were going through and teaching myself to crochet. To this day, it is my go-to place for my morning coffee and devotional - minus the winter months of course. It is just such a warm and happy room now.

I had more plans for this space, but once the For Sale sign went in the yard I crossed those plans off. 

However...as you know, we did NOT move...so onward!

Both my girls will be in school this year and then we have a couple friends coming over after school as well, so I knew I needed to have a space for them to put all of their coats, backpacks and shoes. 

Oh, a Pinteresting we will go...

I found lots of options via Pinterest but I finally settled on making a coat rack wall. 

Remember this wall?


Puuuuuuurfect. 

Some measuring, planning, and a trip to Menards later...my wall was going up.
Have I ever mentioned that I love having a hubby that can do stuff like this??? I asked him to build me a wall...and he did. He is so cool!

Here it is with all the wood up.


I bought some coat hooks and planned to stagger them. I had him put a shelf up top, too, for decorations and/or lost items.

I also decided it would help the chaos if I designated each space for each child. We had some leftover wood so I found an easy way to make a wood sign without needing a Cricut or Silhouette machine (cuz those are too rich for my blood). I made a little sign with each child's name and placed it on their spot. I actually have a project started (yes, another one) using this method and when that is done, I'll post it on here.

Ready? Here's the finished product!


What do you think?? 

I'm totally in love! No more backpacks on the floor, shoes being thrown around, or lunchboxes getting lost. I'm still toying with the thought of putting a bench or two for the kids to sit on, but I might just buy a couple shoe rugs instead. I'll wait until the messy weather comes to make that decision.

As for my decorations, I got lucky there, too. Basically, I wandered around my house and found things that had no home and put them up there.
The wire baskets were used by my mom for the girls' Easter baskets this year. I put my gardening stuff in one and the other is empty for any future lost gloves or hats.
The "It Is Well" sign is one that I found at Hobby Lobby (With the 40% off coupon!) a few months ago. I bought it thinking it would go up in a rental house somewhere but had yet to find a home for it in this house.
The lanterns were a clearance purchase from Michael's last summer. I originally had them on the windowsills on the porch.
The "M" was made by Jilly a couple years ago at daycare and used to hang on the door.
 And then I just grabbed some random candles sitting around my house. It all got thrown together in a day, but I think it turned out pretty cute, and now all those things have a home!

The best part about all of this, from beginning to end, is that it didn't cost a ton of money. It was the cost of a few cans of paint, some wood, coat hooks, and my decorative stuff. Of course, we were lucky and didn't have the cost of the flooring, but we were prepared to pay for it. That would have been the most expensive part. It was more blood, sweat, and tears than it was money. Painting an entire room (walls and ALL woodwork) FOUR times is a lot. A LOT. 

So there you have it!
 My front porch facelift.

From this:

 To this:


Do you have any DIY facelift stories to share?
I'd love to hear them! We are staying in this house for awhile and there are plenty more things to do!


Friday, August 8, 2014

Chicken and Salsa Skillet


Hi!!!!

Hey, I'm back! Where did I go? That's a great question, and when I have an answer for that, I'll let you know. 

The last year and half has been such a whirlwind for me and my family. Up and down...and down again...and down again...and now I am cautiously hopeful that we are on an upswing. 

I've composed a million blog posts in my head explaining the last year to all of you. And since all of those thoughts are still swirling in my head, I'm going to set them aside and just return to blogging with an awesome recipe to use up those over-flowing garden veggies. 

I do not have a garden. (Gasp!) I have never had a green thumb...most things I planted in the past died. And I don't have house plants because my darling cat eats them. Even the fake ones. Seriously, any silk flowers in my house are in wall-mounted vases. She WILL eat them. 

This year, we had our house for sale (part of the swirly, whirly, long story) and I decided to try planting flowers in the flower bed to spruce up the curb appeal. If they all died, oh well. 
Surprisingly, they lived!


 These pictures are from right after they were planted. Today, they are thriving!
 Win!

After this small success, my hope is that next year we will try a vegetable garden. But until then, I will just continue raiding the gardens of all my friends.

This recipe is very easy to throw together and is pretty healthy. It's great for the nights that you work or have games to get to. (Because it's August...and we have to start thinking about school schedules...sigh...)


The ingredients are chicken, pasta, salsa, corn, green pepper, and cheese.

Cook your pasta according to the directions on the box. We use whole wheat pasta from Aldi that is less that $1/box.

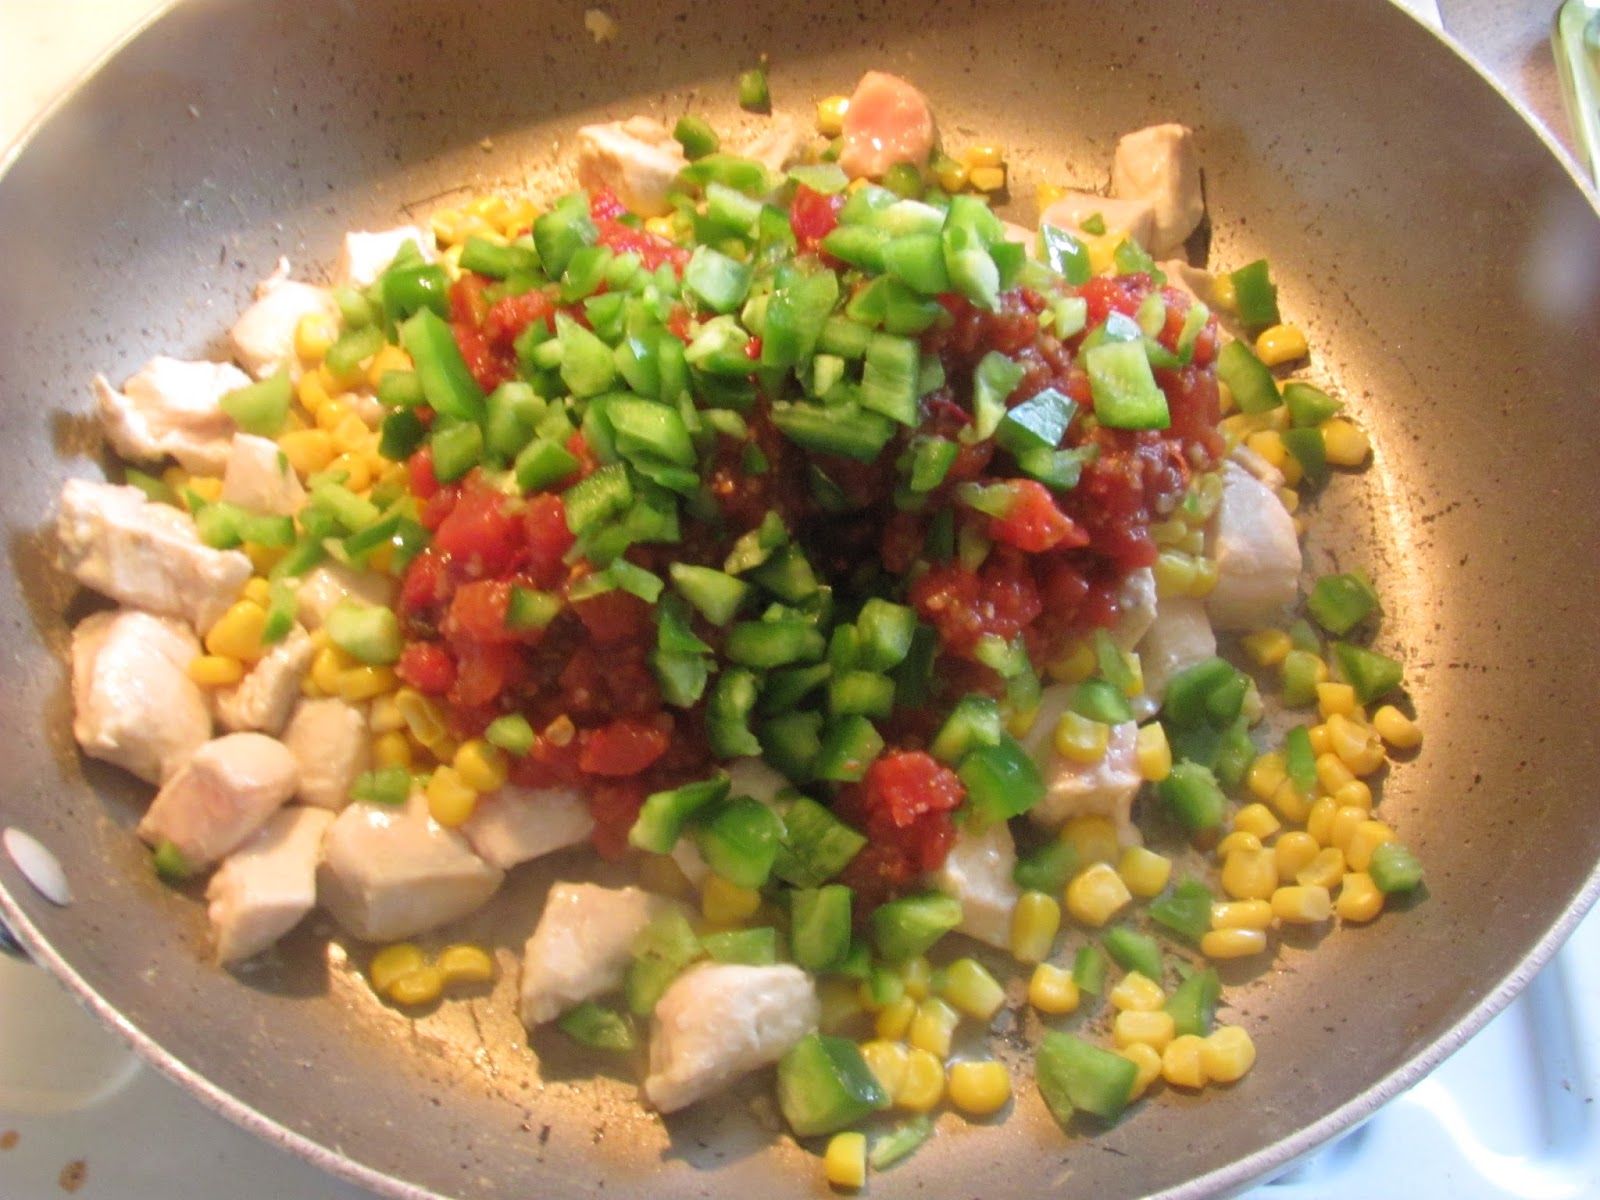
Cut up boneless, skinless chicken breasts into bite-sized pieces and start cooking the chicken in the skillet with some olive oil for about 2 minutes. Stir in salsa - you can use any salsa. We are big fans of Wildtree Fiesta Salsa Mix, but today I made homemade salsa for the first time. It's marinating for 24 hours, so I can't tell you yet how it turned out...BUT if it's good, it will be posted ASAP. I'm overly excited about this salsa...

Next, stir in corn (canned, fresh or frozen) and chopped green peppers. Bring to a boil and then simmer on med-low heat for 10 minutes, or until chicken is cooked through. Make sure to stir occasionally so it doesn't burn. 

Drain the pasta and stir into chicken mixture.


Good grief, that looks amazing. In all honesty, I haven't made this in awhile. These pictures are from a few months ago...It just never made it to the blog. Just keepin' it real.
 I'm thinking this will be on the menu next week. 

Sprinkle cheese on top and cover to allow cheese to melt.

This night I tried out roasting green beans to go along with the meal. I just tossed some fresh green beans in olive oil, garlic salt and Parmesan and then roasted them in the oven. 

 
More honesty here...I have yet to master the art of roasting vegetables. It seems like it should be a pretty simple task compared to all the other ways to cook vegetables...but I just haven't been able to figure it out. Every time I've tried they turn out...well..let's just say... not awesome.
So if anyone would like to share the secret that I'm missing, please do!


There it is. An awesome chicken skillet and some so-so green beans. 

Thanks for sticking with me despite my year-long absence. 
You guys are the best!


Cheesy Chicken and Salsa Skillet
recipe from www.kraftfoods.com

  • 2 cups whole wheat penne pasta, cooked
  • 1 Tbsp olive oil
  • 1 lb boneless, skinless chicken breasts, cut into bite-sized pieces
  • 1 1/4 cups salsa
  • 1 cup corn, frozen (or fresh/canned)
  • 1 large green pepper, chopped
  • 1 cup shredded cheese of your choice (we like colby jack)
Cook pasta as directed on box.

In a large skillet, heat olive oil and add chicken pieces. Cook for about 2 minutes. Stir in salsa, corn, and green peppers. Bring to a boil and then simmer on med-low heat for about 10 minutes or until chicken is cooked through. Stir occasionally. 

Drain pasta. Add to chicken mixture and stir. Sprinkle with cheese. Remove from heat and cover. Let sit until cheese is melted.


Tuesday, January 14, 2014

Fighting My Fears and Finding Hope

{I had a blog post planned for today with a great soup recipe for these cold days. But as I began to type, my thoughts kept going in a different direction. It didn't take me long to figure out that God had a different plan for this post....I hope it touches someone.}


 Happy New Year! 
Oh that was two weeks ago?
 
With every new year comes new resolutions; Lose weight, eat better, exercise, read my Bible, stop hiding in the pantry eating donuts.....

Well, I'm sorry but I like donuts.

Do I need to do all the other things I listed? Oh yes...yes, yes, and yes. But instead of putting all kinds of pressure on myself to do those things that are really a struggle every day of my life, I'm needing a different kind of resolution this year. 

I don't know about you but I'm glad 2013 is over. That was an incredibly trying year for myself and my family. Now that we are 2 weeks into 2014, I'm beginning to have hope for the future again. Our trials are far from over, and there were quite a few months that I had really lost hope that things would ever get better. And while they have yet to really get "better", God is helping me find some hope again....slowly.


This was at the top of my Pinterest home page 15 minutes after finishing a devotion about hope.

What's that God? Yep. I heard you this time.

After I got the "hope" message, He sent me a message on trust.

"When I am afraid, I will trust in you." Psalm 56:3

When I am AFRAID.....that's what it is. Fear. The thing holding me back from being hopeful and trusting that God has it all under control is fear. I didn't realize this until our pastor had us write down the one thing holding us back from moving on to a better year. It was my fear. Fear of the unknown, fear of making the wrong decision, fear of the consequences of those decisions, fear of failing....the list goes on.

But in the midst of the fear, I have been reminded in the last couple days that not only do I need to remain hopeful for the future, but I need to put my full trust in God to carry me through. 
Let me clarify. I'm not trusting that He will make my life perfect and wonderful; I am trusting that He will carry me through it. I have no idea what's ahead of me. In an instant everything I have could be gone. I could be gone. But what ever is in store for myself or my family, I have to trust that He is here with us and carrying us the whole way. And when you have the trust...it makes it easier to hope. 

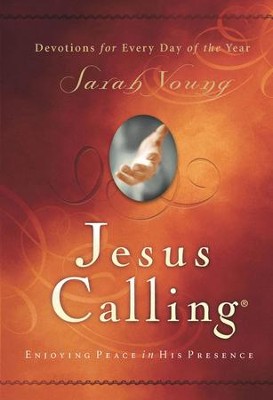
During one of my trials this year, my dear friend Marcie at The Mustard Seed gave me a devotional called Jesus Calling. It was given to her during a very hard time in her life and she knew it would help me. But I wasn't ready for it then. A week ago, I decided I was ready to try it. It's a daily devotional for each day of the year and the words are written as if Jesus was the one saying them. It also incorporates Bible verses to look up.


Jesus Calling: Enjoying Peace in His  Presence - Devotions for Every Day of the Year  -     By: Sarah Young

It has hit the mark every day. Hope. Trust. Trust. Trust. One day that I read it, my eyes stopped seeing the actual words and it was like God took a big stamp and stamped "TRUST ME" on the page. It didn't matter what the devotional was saying, I read "Trust Me". 

Insert from Jesus Calling by Sarah Young
 But Lord, it's so much easier said than done! I can say that I trust him, but to actually do it? That takes work. Whenever I start to worry about the future, I need to trust him. When I begin to dwell on the past, I need to trust him. When I have a day that I feel like I can't even get out of bed......I need to trust him. 

 I'm still in the midst of my trial. But when I started this devotional, I literally didn't have the energy to hope that things might work out someday. It was exhausting to think about because it seemed so unlikely. But I just kept reading. Each morning I set my alarm 30 minutes before the kids get up so I could start my day with Jesus, and believe me it has not been easy! I am NOT a morning person. The first day I fell asleep sitting up. Talk about humility....Sorry God! I didn't mean to fall asleep in the middle of our conversation! Even though it's still hard to wake up, every day I do I can feel little rays of hope creeping in. Ever so slowly, but they are there.  

I wish...oh, how I wish I could sit here and tell you that in the end everything worked out beautifully. And maybe someday I will be able to say that. I share this with you because so many times people gloss over the hard times in life. They plaster on a smile and tell everyone they are fine. But I'm hoping to break that mold with authenticity. I am a real person, with real fears, real trials, real hopes and heartbreaks. But I also serve a REAL God that loves me no matter how imperfect and broken I am. 

You want to know what today's devotional says?

"Do not be ashamed of your emptiness. Instead, view it as the optimal condition for being filled with My Peace. It is easy to touch up your outward appearance, to look as if you have it all together. Your attempts to look good can fool most people. But I see straight through you, into the depths of your being." (Jesus Calling by Sarah Young, pg. 15)

You want to know the crazy part? I literally just read this for the first time. Right now. My alarm didn't wake me up this morning, so I had yet to do my devotional today. 

Do you have chills? Because I do!

Let me leave you with this. 

"For I am convinced that neither death nor life,  neither angels nor demons, neither the present nor the future, nor any powers, neither height nor depth, nor anything else in all creation, will be able to separate us from the love of God that is in Christ Jesus our Lord." Romans 8:38-39


Trust Jesus. Have Hope in Jesus.
Those are my resolutions this year. Not by choice, but by necessity.

If you are having a similar time in life right now, or have had one in the past, please share your story! My only purpose in writing this is to reach out to other people that need to know they are not alone. And friend, you are NOT alone!

I highly encourage you to get this devotional and do your best to read it every day. I've only been at it for a week and it's already changing me for the better. Well, GOD is changing me through the book. 
You can order it HERE for $8.

God Bless you this year....and here's to hoping and trusting that it will be better than the last. 

Wednesday, December 11, 2013

Eggs a Go-Go

Here is another fabulous recipe out of the Mayo Clinic Kids' Cookbook.
Easy and delicious - the best kind of recipe.
 I don't really like the name of it, because I don't get it...but that's the title in the book and the kids think it's cool...which I suppose is the point seeing as how it is a cookbook for kids. Ok, so I guess now I get it.

Because it has lots of eggs and green veggies in it, I feel like this can be served as breakfast or a breakfast-for-dinner meal...which is what I did. I figure it's still fun for the kids to eat breakfast food for dinner and I don't feel guilty feeding them sugary syrup before bed. I don't know about your kids, but mine do not need the extra energy at the end of the day....they have plenty of their own. 

This recipe is also a great way to sneak some veggies in their diet. It has spinach (which is almost tasteless in this), green peppers, and onion. I couldn't believe it when my 3-year-old stabbed a piece of onion with her fork and asked "what's this?". I told her it was onion, she ate it and said "I like onion!". I almost fell off my chair. Even I don't like plain onions. 

The point being, even if they say they don't like something, if you can sneak it in and get them to try it again and again, they may find one day that they do like it. Hey, I figure it's worth a try!

It's ridiculous how easy this is.
All you need is 6 ingredients - eggs, spinach, green pepper, onion, milk, mozzarella.


Throw defrosted and drained spinach in a bowl with chopped green pepper and onion.


Add your eggs, milk, and shredded mozzarella to the bowl and whisk all ingredients together.


Line a muffin pan with foil muffin cups and coat with cooking spray. 
Pour 1/4 cup egg mixture into each cup.


Bake at 350 degrees F for 20 minutes. 
Insert a knife in the middle of several cups - if it comes out clean then they are done. If not, cook for another 3 minutes and check again.


Oh yeah...that looks GOOD.

Serve with some fruit, toast, juice...whatever breakfast-y foods your family likes! 

I did make a couple changes to the original recipe. The original called for egg substitute....I'm sorry, but yuck. I like real eggs. 
It also called for 16 oz of frozen spinach. I don't know about you, but getting my kids to each veggies is not always the easiest thing. I felt like 16 oz was A LOT of spinach, so I just used one box of Green Giant frozen spinach, which was 9 oz, and that was plenty. 
Lastly, I added milk. I grew up with my mom putting milk in our eggs which makes them fluffier. So I decided to throw some milk in there.

This went over so well with my girls, they both had the leftovers for breakfast the next morning.
Cooking Win!

Eggs a Go-Go
  • 9 oz package of frozen chopped spinach
  • 1/4 cup diced green bell sweet peppers or finely chopped broccoli florets
  • 1/4 cup diced onion
  • 2 cups eggs - I used 9 eggs
  • 1/4 cup milk
  • 3/4 shredded reduced-fat mozzarella cheese
Preheat oven to 350 degrees F. Line muffin tin with foil muffin cups and coat each cup with cooking spray.

Microwave spinach on high for about 2 minutes. Squeeze out excess water.

Put spinach, green pepper, and onion in a large bowl.

Add eggs, milk, and shredded cheese. Whisk ingredients until combined.

Pour 1/4 cup of egg mixture into each muffin cup. If there is leftover mixture, pour it evenly into each cup so they all have the same amount.

Bake for 20 minutes. Insert knife into the middle of several muffins - if nothing sticks and it comes out clean, they are done. If not, bake for another 3 minutes and try again.

Serve when fully cooked.

Wednesday, December 4, 2013

DIY Advent Calendar


This Christmas I'm striving for a little more than usual. 

We currently have our house up for sale and so due to that and the need to acquire a new house when we sell ours, we are keeping Christmas on a smaller budget this year. 

Aside from the smaller budget, I was feeling the desire to get back to basics - the basics of Christmas. Forget the stuff, the deals, the decorations, the food, the stress, the money, the traveling, the craziness....and remember what this holiday is really about - the birth of Jesus Christ. 

We always celebrated Advent when I was young. We had a spiral book that had bible verses and stories in it for each night of advent, and then we would light a candle each week like some churches do. I remember enjoying those nights very much. Sitting around the dining room table, reading about the birth of Jesus and drinking hot chocolate.

In all honesty, I have been a bit of a slacker at Christmas time. We don't get the kids super excited about Santa, we don't do the Elf on a Shelf thing, and I always would remind the kids that we were really celebrating Jesus, but that's kind of where it ended. I went through the motions; focusing on decorating the house, coming up with the perfect gift for each person, and coordinating our schedule so we would see all the family. Of course, Jesus was a part of our holiday every year, but I was failing at making Him the center of it. 

So this is the year for a change. 

Through some very hard trials, I come to the end of this year searching for more, needing more, of Him. And realizing that my children need Him as well. It's not enough to just go to church on Sunday and expect the pastor and Sunday School teachers to teach my kids about God. 
It starts and ends at home.

The buck stops here my friends. 

And so this year I decided to get the Advent tradition going again. I found a list of Bible verses on Pinterest to read leading up to Christmas and thought it would be perfect. The kids were excited about reading the verses, but I wanted them to have the fun of the anticipation of what's coming tomorrow. So I came up with this DIY Advent Calendar.


It took some time to make, but it was pretty simple!

I used foam poster board, Christmas scrapbook paper, red cardstock, double sided tape, stickers, a ruler, and a pencil.


Thanks to Hobby Lobby's 40% off coupon and their continuous sales, the whole thing cost about $15!

I measured the poster board and divided it into 5 rows and 5 columns. And then I measured out a square that would fit in each section. My paper squares measured 3"x4".

 I didn't want to draw any lines on the front of my board so I just eyeballed it when I taped them down. I'm not too much of a perfectionist and I just really wanted to get it done, so I did my best.

I cut slivers of the tape and taped three sides, leaving the top of the square un-taped so I could slip paper inside later. 

For the numbers, I got really lucky! I was planning on buying number stickers to number each day but I found a piece of scrapbook paper that had all the numbers written in really neat ways, so I cut out each number and taped those onto each square. They gave it a completely different look!


Once all the squares and numbers were taped down, I cut up red cardstock paper and wrote a verse on each one. Then I decorated the slips with some fun stickers just to give it a little more surprise for the kids. 


Some of the stickers are Nativity stickers and I put those sporadically throughout all the days....leading up to the 25th when Jesus is born.


To hang it....well...I poked a hole in the back of the foam and hung it on a nail. What can I say? I'm not fancy.

I'm so excited about the calendar. It turned out really cute and fun, and it will be reusable for the years to come. 

But most of all, I'm really excited about doing Advent with my girls. We have done three nights so far and I am already seeing the benefits of doing this. All three nights, 30 minutes before bed, we have sat down together and read the verses for that day. After reading the passage, we go back and look at each verse and I make sure they understand what it means. There has been no TV on before bed like usual, and they haven't missed it so far. (Yay!) Reading these verses together has opened the door to questions that my daughter has never asked before and history she hasn't learned about yet. 

It is only the 4th of December, so it's not too late! If you don't want to make a board, at least let me encourage you to read these verses with your family each night this month.You will be amazed at the things you will learn while trying to teach your children. I promise you won't regret it.

What are some other ways that you have come up with to keep Christ in Christmas?? Please share!